
Flutter is Google's UI toolkit for crafting beautiful, natively compiled applications for mobile, web, and desktop from a single codebase. Flutter not only enables us to create lavish Mobile apps but it gives whole meaningful Software Architecture to create Platform Independent Mobile Apps.
Flutter codes are highly reusable as compared to Android or iOS Codes. All you need is to put the library you want to import and Use the codes directly. Now it's more like building Web Application.
This Tutorial will discuss from Installing Flutter to Developing your first Hello World Application.
Prerequisite:
- Basics of Object-Oriented Programming (OOP)
- Dart (Very similar to JavaScript) Know more about it on https://dart.dev/guides/language/language-tour
1. Installing Flutter
The best way to install Flutter is to download the installer from the Flutter website.
Once the flutter is downloaded make sure that it's bin folder is added into the path. For macOS or Linux Users
export PATH="$PATH:`pwd`/flutter/bin"Window's users will have to add flutter\bin path to env (environment variables).
Now verify your installation by putting command flutter --version in the terminal.
Now run command flutter doctor to check for missing dependancies.
Setting up Visual Studio Code (VSCode)
VSCode is one of the best lightweight Flutter Editor with almost all functionalities. You can install it from code.visualstudio.com/download. Once downloaded you will need flutter Plugins/Extension.
Search for 'flutter' & download 'Flutter 3.11.0'+. Now we are all Done with Setup.
2. Create a Flutter Project
- Press
Cmd+shift+Pin VSCode. - Now search for 'Flutter: New Project'.
- Give your project a name in lowercase format joining words with an underscore.
- Choose the folder where you want to place your project.
- Once done it will a minute to create a Project.
- Once project is successfully created you will see the message by VSCode.

Create an iOS Simulator
Make sure to install XCode before this. Go to the terminal of your Mac are run:
sudo xcode-select --switch /Applications/Xcode.app/Contents/Developer
sudo xcodebuild -runFirstLaunch
sudo xcodebuild -license
This may ask you to accept the XCode Licence Agreement. Now open a Simulator by running:
open -a SimulatorRun your Project
- You will simply have to go to Menu -> Run -> "Run without Debugging"
- This will ask you to either create an emulator or select a Simulator.
- For this project, I will choose iOS Simulator.
Note: While running iOS Simulator you may receive the error below. You can check this article for a solution.
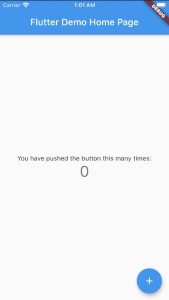
Warning: CocoaPods not installed. Skipping pod install.You application will look like this:


Leave a Reply